Girlfriends Christmas Party Invite


Ok this isn't really a gift idea but its the invitation to my "Girlfriends Christmas Party" that I'm having next week... invitations are simple.. maybe too simple but they're done and in the mailbox.

At the party I'm serving dinner...

3-4 different homemade soups
homemade Parmesan breadsticks
strawberry spinach salad (because its Christmas colors and so yummy!)
Hot Chocolate bar (mints, marshmellows, chocolate chips, etc)
Caramel Apple Cider

and then for dessert everybody will be bringing their favorite homemade holiday treat

I'll also be doing door prizes every twenty minutes... I'll have questions made up before hand and every twenty minutes I'll draw a question and somebody will win a gift... gifts are Christmas items... most from the dollar spot (actually the $2.50 spot ) at Target... christmas towels, cookie cutters, a Christmas movie, a christmas apron, etc.

We'll finish off the evening with "My Favorite Things" gift exchange and everybody received an insert in their invitation describing what to bring.

I hope that it turns out well... I'm reallly looking forward to it!!

submitted by MaryRuth Francks
www.thefrancks.typepad.com

Christmas Pineapples


My friend Kristi has the best ideas! Every year she gives out pineapples with a big red bow attached.
They are simple, beautiful and an especially delicious treat for everyone. They make great thank you gifts,
are a great addition to any homemade meal you might be delivering, and are great as gifts for friends and neighbors.
The pineapple symbolizes hospitality. In colonial times, if a pineapple was placed at the entrance to a village or placed as
the main centerpiece on a dining table, it symbolized the utmost welcome and hospitality to the visitor.

Submitted by Liz Brown (www.brownsarebloggin.blogspot.com)

Christmas Card/Sucker idea


Here is one of mine from last year...sorry the photo of the actual item
isn't all that great, but they turned out really cute! We dropped them by
several neighbors and ward members homes and rec'd lots of calls asking how
we made the succors and the tags.

Chocolate Lightbulb Succors:
Candy Molds
Melting Chocolate (I used red and green for the bulbs & brown for the little
screw tip)
Succor Sticks
Candy bags for wrappers (or any kind of cellophane)
Ribbon
Treat Tags

Directions: Melt chocolate in microwave on 50% power stirring occasionaly,
until smooth. Pour into molds and lightly tap mold on counter to allow air
bubbles to rise to the top. Insert sticks. Let harden in fridge or freezer.
Candy should be ready to remove from molds in about 30 minutes.

Note: I purchased about five molds so that I could make several at a time. I
got the light bulb molds from Hobby Lobby, but you can get them at Michaels
or any type of Cake/Candy shop. With the molds and candy I believe I spent
around $20 and made over 100 succors.

Treat Tags:
I created the tags in photoshop using a few digiscrap supplies I already
had. I printed them in a 2x3 business card size and attached one to each
group of succors (Each group had a succor for each person in the recipients
family).

I came up with the tag idea and got the light bulb strand from:
http://heatheranndesigns.info/catalog/product_info.php?cPath=21&products_id=33&osCsid=dc7565ea6991e44f06555b38c1aef4de

Submitted by: Jennifer Kesler http://jenkesler.blogspot.com

Christmas is coming!

Hello friends! I know I have been out of touch with all of you. Actually there was so much of work as well as there was the Thanksgiving week. This year we had small gathering on Thanksgiving as most of the relatives and friends are coming home on Christmas. I have already started counting the days. Even I put up a Christmas countdown. Isn't it nice? It's a perfect Countdown to pimp for your profile. Check it out.


Lets Shop Online

Let's Shop Online I have had the opportunity and pleasure of meeting very wonderful people who also have online stores, blogs sites, ebay stores and myspace friends. I currently have a top 100 site that is still fairly new, please come join us. I would love you to join my friends list as well,@ www.myspace.com/in2stuff or also @ www.myspace.com/jusbcuzdezins If you have a web store please leave me a comment. I want to hear from all of you. Check out my Friend "Chic Girl" @ http://www.mychicthings.com/

82. Little Peeps Baby Blanket


MATERIALS:
    5 fat quarters of lilac calico
    4 fat quarters of lime calico
    1 fat quarter of orange calico
    1/2 yard of yellow chenille
    1-1/2 yards of lavender flannel for backing
    4 yards of 3/8" lavender ribbon
    Black beads
    2 packages of Heat 'n Bond® fusible web
    Crib-size quilt batting
    Peep Pattern (PDF)

    Scissors
    iron and ironing board
    sewing machine
    rotary cutter and mat
    safety pins
    needle and matching thread
    invisible thread.


INSTRUCTIONS:
    (Note: all seams are 1/4")

  1. Cut five 14" squares of lilac calico. Cut four 14" squares of lime calico. Cut eleven 2-1/2" strips for binding; strips should measure 2-1/2" x 18". Set aside.

  2. For each square, enlarge chick body, feet, and beak pattern 200% and trace on paper side of Heat 'n Bond®. Follow manufacturer's directions to fuse body tracing to chenille, and feet and beak to orange calico. Cut and fuse to squares.

  3. Machine appliqué as desired, using zigzag, button-hole, or straight stitch.

  4. With colors alternating, sew blocks together in rows of three. Sew rows together.

  5. Cut one 44" x 44" square of flannel for backing. Cut one 44" x 44" square of batting.

  6. To layer, place backing right side down and lay batting over backing. Place quilt top right side up on top of the batting. Beginning at the center of the quilt top, pin the layers together every 4” to 6", smoothing the fabric as you work toward the edges.

  7. Quilt as desired, or use photo for reference. If machine quilting, use a quilting foot. Adjust stitch length to 6 to 12 stitches per inch, and loosen upper tension if using invisible thread. Begin in the center of the quilt top and quilt outward in all directions.

  8. Sew the eleven 2-1/2" x 18" strips together end-to-end in alternating colors to form the binding. Press all seams open. With wrong sides together, fold and press the binding strip in half lengthwise. Turn the short raw edge of the binding strip to the inside.

  9. Beginning at the center of one side, match the raw edges of the binding strip and the quilt top. Begin sewing the binding to the quilt top through all layers. Stop sewing 1/4" from the corner of the quilt top; backstitch and clip threads. To sew the corners, remove quilt top from under presser foot. Fold the binding strip up, creating a diagonal fold. Hold this fold in place with a finger. Fold the binding down to create a fold at the top edge and align with the adjacent quilt edge. Sew through the top fold, stitching through all layers. Continue around quilt, repeating diagonal fold at each corner.

  10. When the binding meets at the start point, insert end of the binding into the folded binding and continue stitching. Clip threads and remove quilt from the sewing machine.

  11. Trim excess batting and backing even with the quilt top. Fold binding over the seam to the back of the quilt. Hand-stitch the binding to the backing fabric to cover machine stitching.

  12. Make small bows and attach at each chick neck. Sew black beads in place for eyes. Double stitch bows and beads to secure firmly. Alternate eye option: use DMC® black floss or pearl cotton to create a French knot.

    Approximate Crafting Time: 8 hours
    Skill Level: Intermediate


RESOURCE: Sewing.org


Happy Thanksgiving !


Just wishing you all a very happy thanksgiving...

Women's Fishing T-shirts

Reel women will want to check out the latest line of ladies cut, soft, 100% cotton fishing t-shirts from Fishboy called (what else) "Fishgirl".

Link - See all the women's fishing designs at: http://www.fishboy.com/Fishboy_s_Originals_for_Women_s/86.htm

Help

Do any of you blogger savvy people know how to get rid of the blogger blue border that is around my banner?

Any help would be much appreciated.

Thanks,
Emily

Pilgrim Hats


I found a cute idea on the Family Fun Website. Tonight for Family Home evening we talked about Giving Thanks and for our treats we made these cute Marshmallow Pilgrim Hats. The kids had a great time and they even taste pretty good. I also thought this would be a fun Visiting Teaching Family Treat. All you need is: Shortbread striped cookies, milk chocolate chips, large marshmallows, and a tube of yellow decorators frosting.

The gift bags for my visiting teaching ladies turned out great! I even created a great tag with the instructions on Photoshop! Happy Thanksgiving to Everyone!!

submitted by Emily H.(www.holversonfamily.blogspot.com)

Sparkling Cider Gift


We did this one year for neighbor gifts and I thought I'd share the idea...

I bought tall skinny bags (meant for wine, I think) in the Christmas section at Target and put a bottle of Martinelli's Sparkling Cider in it and attached a homemade tag that said:

"Have a Very Merry Christmas and a Sparkling New Year!"
Love, the Browns

submitted by Shelly(www.shellyabrown.typepad.com)

Link

Here's another great link courtesy of Hilary!

http://www.utahholidayguide.com/christmas/gifts/articles/little_gifts.asp

Zilla Tool from CRKT


From Random Object Review Blog - "This is one of Columbia River Knife and Tools (CRKT) latest creations, launched under the Inspired Design works (I.D. Works) branch. Available in either bead-blast or black, the Zilla-Tool is basically a large plier with a large knife blade and some bits thrown in for good measure. For a multi tool the Zilla-Tool has a rather small number of implements, with competition such as Leatherman, SOG or Gerber all offering a much larger assortment of implements on their tools. However the Zilla-Tool sports a new design approach to multi tools with focus on the arguably the two most used implements; the plier and the knife blade..." Full Review

Available here

81. Bird House


MATERIALS
    Gourd
    Spoon (to hollow out Gourd)
    Drill
    1 1/2" diam. drill bit (for entrance)
    Drill bit matching the diameter of your perch
    smaller drill bit (for hanging hole)
    small twig or branch for perch (optional)
    Twine, leather, or wire (for hanging)
    glue
    No VOC paint


INSTRUCTIONS
  1. Using your 1 1/2" dril bit, drill a hole in the middle of your gourd.
  2. using your spoon or other tool, scoop out the gourd interior. (you can skip this step by purchasing a ready-made Gourd from your craft store)
  3. allow to dry
  4. measure the diameter of your perch material, using the same/similar diameter drill bit, drill a hole one inch below your entry hole.
  5. with the smallest drill bit, drill a hole in the top 1/2" on the gourd. This will be for your hanging wire.
  6. If you so choose, paint your gourd (exterior only), and allow to dry
  7. once dry, glue your perch into it's hole.
  8. thread your wire (or other material) through the top holes

Resource: Two Straight Lines


80. Altoid iPod Speakers


MATERIALS:
    Pair of old headphones
    2 playing cards
    Glue
    2 Altoids tins
    Electrical tape
    X-acto knife
    Pin
    Awl
    Lighter
    Wire cutters


INSTRUCTIONS
  1. Dismantle the headphones and remove the speakers.
  2. Use a pin to poke a small hole in each of two playing cards, then glue the speakers to the cards, lining up each speaker with the hole.
  3. Use the awl to poke a hole in the back of each tin, then thread the speaker wire through the holes.
  4. Reconnect the wires by twisting them together and burning the plastic coating off with a lighter. Then tape them off.
  5. Place the foam padding from the headphones inside the tins, open side up, to cushion the speakers.
  6. Trim the cards to fit inside the tins, place them inside (use glue if necessary). Note: The sound will be a little tinny.

Resource: Readymade


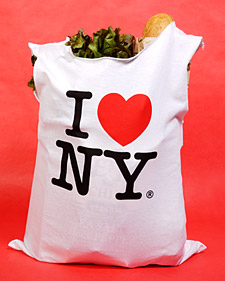
79. Going Green T-Shirt Shopping Bags


Turning an old T-shirt into a reusable shopping or grocery bag is a simple, clever craft to help everyone be "green." It's a Good Thing that will help protect the environment.

MATERIALS
    Heavy-weight cotton T-shirt
    Pins
    Sewing machine
    Medium-size bowl
    Water-erasable marking pen
    Scissors


INSTRUCTIONS
  1. Turn T-shirt inside out and pin bottom of the T-shirt along the hem. Using a sewing machine, sew bottom of T-shirt closed. Flip shirt right side out and lay flat on table, making sure all seams are lined up.

  2. Place medium-size bowl about half-way over the neck hole. Using a water-erasable marking pen, trace along the edge of the bowl. Cut along the outline, making sure to go through the front and back sides of the shirt, in order to create an opening for the bag that's larger than what the neck hole allows.

  3. Line up the hems on the front and back side of the sleeve and cut, making sure to go through both sides of the shirt. Repeat on the other sleeve. Tip: A jersey shirt would also work well for this craft, as it is already sleeveless, and it's made of a great mesh material.

Resource: Martha Stewart


78. Bath Mits


For a generous source of lather and to put an end to searching for the soap on the bottom of the tub, slip a soap bar into a pocket made from a luxurious terry washcloth.

MATERIALS
    wash cloth
    cotton cord
    needle & thread
    scissors


INSTRUCTIONS
  1. fold the washcloth in half, and cut it to the desired length.
  2. Tape a 2 1/2-inch loop of cotton cord inside the folded cloth.
  3. Stitch along the bottom and side edges, leaving a 1/4-inch seam allowance (make sure to catch the ends of the loop).
  4. Turn the pocket right side out.
  5. After each use, hang the washcloth mitt by its loop to dry.


Resource: Martha Stewart


More Online Tutorials


this blog: http://adventureswiththeprovosts.blogspot.com/ is also doing 30 Days of Homemade Gift Ideas. They're intermingled with her regular blog posts... but she has some links to fun tutorials!! And they're not all sewing! (phew!) I like sewing but I'm not as talented as Little Miss Shelly! ;o)

submitted by Hilary

AWESOME ONLINE RESOURCE!


Okay, in the last post Shelly shared a tutorial from a cute bag she found online. The site she found it on is sharing 30 days of gifts to sew for the month of November. So if you're the sewing kind this link is for you!


http://sewmamasew.com/blog2

Tote Bag


Click on the link below for a step by step tutorial on how to make this adorable bag that Shelly (www.shellyabrown.typepad.com) found on the internet.

http://writemamawrite.typepad.com/photos/dishtowel_tote_tutorial/index.html

Don't Forget & Helpful Info

Hello All,

My friend Kelly had a great suggestion and I finally figured out how to do it. So, if you look on the sidebar you will see a section titled "click here to view ideas by category" and then below you can click on whatever type of ideas you're looking for like Halloween, visiting teaching, etc. I try to label each idea for all it's possibilities. You can also do a search in the box in the top left corner to try and find something specific you might be looking for.

I also wanted to remind all of you that have submitted ideas for this blog to occasionally check the comments on your ideas posts. Some readers leave questions about your gift there and are hoping you'll answer!

Thanks, and keep the great ideas coming!
Emily

Ultra Small But Powerful LED Flashlight


Runs on a 9 Volt battery. Has full on and flash modes.

Available here

Holiday Frames


What a cute, easy, inexpensive way to doll up a multi-opening frame. This example uses Making Memories prodcuts, which I love.

Source: Unknown. (thus the smearing of the faces)

submitted by Hilary

Nativity Blocks


This is a fun idea for nieces, nephews and even your own kids. I saw this on a message board and asked the girl if I could share.

Paint blocks with a few coats of paint. Then apply the stickers. Ink or sand the edges to distress. Then put a coat of Mod Podge on them to seal in the stickers. Let dry.

This particular set of stickers is by Me & My Big Ideas (MAMBI). They are no longer made, so if you like this set you just have to hope a craft or scrapbook store still carries this line. I've done extensive searches online and they are hard to find! However, there are other brands of Nativity stickers. You could probably even find cute nativity clipart.

submitted by Hilary

Halloween Treat "Hand" bags


Ok, I know Halloween is over, but this was such a hit at my daughter's Kindergarten class party, that I had to pass it along.
I got the idea from Family Fun's website, which has the best ideas! Anyway, it is super easy and fun!

Here is what you need:
clear, plastic food handlers gloves (I found mine at the Dollar Store)
Candy Corn
Popcorn
Twist ties

Take the candy corn and put one in the finger of each glove. Then fill up each glove with the cooled popcorn, and really stuff it in there.
Then twist the hand closed with your twist tie. You are done! The kids loved them and they are sort of spooky too! I will warn you, that it
took me about an hour to fill about 15 bags, the popcorn was kind of hard to stuff into the fingers.

Submitted by Liz Brown (www.brownsarebloggin.blogspot.com)

Decorative Glass Blocks


I just made these this week, and I thought they turned out really cute! They could be for a gift or a decoration for your home. My sister's ward did this at a Super Saturday and she sent me the stuff to make my own!

Buy a 3 or 4 inch wide Decorative Glass Window from Lowe's. The 3 inch is $3.33 and the 4 inch is $4.28. Choose a saying from a Vinyl Lettering place and a color that you want to put on the window. I chose "Give (orange) Thanks (brown)" and "Silent Night Holy Night(navy blue)." Buy some ribbon to match the Vinyl lettering colors! Buy the ribbon the width of the Glass Window. You need one strip of ribbon to go around the window, and another strip to make a bow! Put the vinyl lettering on and then glue the ribbon on the window and make a bow!

I've heard of other people drilling a hole in the top of the window, and adding Christmas lights to it! I think that would be really pretty!

submitted by Kris

A Little About Me


I thought I might share a little about myself with you.

I am a Mom of 5 wonderful grown children, I am a wife, a grandmother of 21 and almost 22 grandchildren.

I have been married to my hubby for 34 years.


I Love to collect coca-cola memorablia. I have a long awaited coca cola family room in my house. I stored coca cola stuff for almost 20yrs.

I am also a self taught tole/decorative painter.

My hubby draws all of my designs that I paint. I Love to create and design new projects. I have a website where I sell my designs.


I also have pattern packets for almost every item I create, I love for others to take my designs and have fun and be creative with them. I also had a store where I live, that I and my 2 daughters helped me with. People would come from all over to see our designs.

When I paint I add lots of detail to my work, I enjoy bringing things to life. The detail makes that possible. I really don't do primitive work, because I do enjoy the detail part of painting.


If you have a chance visit my website take a look, ask me questions, but whatever you do sit back relax and enjoy. I add new items monthly.
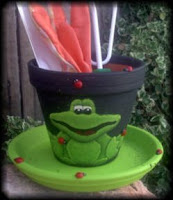
This picture is a frog flower pot that I painted for a garden. I attached small wood lady bug buttons. It is also textured with texture builder so the frog is a little textured. Very Cute.
Happy Blogging to all of you, Enjoy and stop back often.

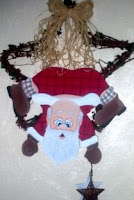
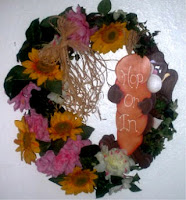
These are a few of my designs. 1st A wood santa on a grapevine star..2nd is a wood santa on a grapevine star...3rd woodsy bear tavernsign and 4th is an adult size canvas apron..


Hand Painted Original Designs


I am a self taught tole/decorative painter. I receive great pleasure painting on all types of mediums. I love to paint on anything.

In some of my designs I love to stain the wood piece first and then when it's dry paint on top of the stain, if is very easy and fun to do.

All of my designs are original designs drawn by my husband. They can all be purchased already finished as a gift, or you can purchase the pattern packets and create your own.

They can be painted on wood, paper mache, wood cutouts, fabric, tin ware, metal, boxes, plates ect. I also do some primitive painting.

Tole/decorative painting is a very rewarding and relaxing way for me to spend my time.

I encourage you to try using my patterns, all packets come with a list of colors and supplies used, 2 color photos, pattern and painting instructions.

Also if you ever had a question I might be able to answer I include my email address for you to contact me.

I hope everyone has a beautiful and relaxing weekend...

This picture I am posting is hand painted on an old shovel and decorated with a fabric bow on the handle. You can purchase this for your holiday decoration by visiting my website @ http://www.jusbcuzdezins.com/

Gumball Can


Saw this on Heather White's blog (www.heatherdwhite.typepad.com). This little treat really shows that it's all about the packaging. I mean seriously, no one would think "hmmm, I'll take my Visiting Teacher some gumballs", but when you see it like this, it sounds like a great idea!

submitted by Emily (www.delightfuldistraction.blogspot.com)

Halloween Bears


Saw this on Hilary's blog and thought it was cute. What a fun party favor for a kids party or fun for a class party.

I think DeMarle makes a Teddy Bear mold like this?

Hand Made Gifts for the Holidays

Everyone loves getting handmade gifts. Remember your family and friends by giving a gifts that comes from the heart and made with Love.
I have been tole painting for about 20yrs. I started painting ceramics, then I had a burning desire to Tole Paint, so I taught myself and here I am now designing my own patterns. My husband draws all of our designs and then I paint them on a variety of surfaces.

I have painted on antique milk cans, old books, cases, paper mache, wood plaques, wood cutouts ect.
All of my gifts are made with pride and love. If I am not happy with an item, I don't add it to my website for sale.

The holidays are getting so close, but there is still plenty of time to pick out that gift for a loved one. Visit my website at www.jusbcuzdezins.com
I have alot to offer. And with every paid order, you recieve a free gift.

Happy Holidays !

Cookie Dough Jars


Instead of taking over a plate of cookies... take a cute jar full of your favorite cookie dough. This way the recepient can bake at her leisure. Make sure to include baking directions. The jar that is pictured in the latter picture can be found in the kitchen section at Wal-Mart for $2.86.

Other fun ideas would be to do sugar cookie dough and attach a cookie cutter. Or fill a shaker jar with fun sprinkles and attach a recipe.

Submitted by Hilary
(second picture & idea found at www.heatherdwhite.typepad.com which is an amazing blog.)
Snowmen Donuts


I thought this would be a cute neighbor gift or FHE treat. They just make me smile! Idea found on web somewhere...

submitted by Hilary

Home Tiles


I think this would be a great gift for a friend or family member. I saw these pictures on Karen Russell's blog (I don't know her). She bought them like this, but I snagged it as an easy idea to recreate.

Michael's has tin tiles (as do other craft stores and boutiques. Some are silver, others are distressed and painted already)... letters of different fonts are easy to find anywhere... Simply adhere the letters (I was imagining Liquid Nails for maximum stick-ability!).

Submitted by Hilary

More Ideas PLEASE!

Okay, I'm starting to feel like an idea hog on here. And I know you all have great ideas. So please, please share them. If you don't have pics it's okay, just type up the idea and then if you make it later on in the season take a pic and I'll add it then. Don't be shy!

Halloween Treat Baskets


A kind lady in our ward always has a little something special for my kids on the Sunday before Halloween. This was her sweet treat this year. I thought it would make a great party favor so I took pics to remember the idea. The baskets are made out of black cardstock. The rectangular boxes are just little match boxes covered in paper. Then inside there is a little candy bar. The round treats have a mint sandwiched in between the paper circles and they all fit nicely in the cute little basket. I'm guessing the stamps came from Stampin Up.

submitted by Emily (www.delightfuldistraction.blogspot.com)